Also consider reviewing: IncogVPN FAQ
To begin using your IncogVPN service, follow these steps:
-
Access Your Active Services: Start by navigating to your active services page: IncogNET Client Area.
Here, you'll see a list of all your active services, including your IncogVPN service. In the example screenshot below, a demo user has multiple VPN plans, including various options within the Netherlands POP.

Screenshot showing active services. -
Select Your VPN Plan: Each VPN plan (Personal Plan, Pro Plan, and Port Forwarding Plan) offers different features, but the setup process is consistent across all plans. For this guide, we'll use the "Pro Plan" as our example. This plan will be featured in the subsequent steps.
-
Create a WireGuard Profile: With the IncogVPN Pro Plan, you can create up to 3 different WireGuard profiles for each location you’ve ordered. This allows you to generate profiles for various devices, such as your desktop, mobile device, or even a VPS or Raspberry Pi. Let’s walk through creating your first profile.
-
Locate and click the "Add VPN Account" button. This will initiate the process of generating your first IncogVPN profile.
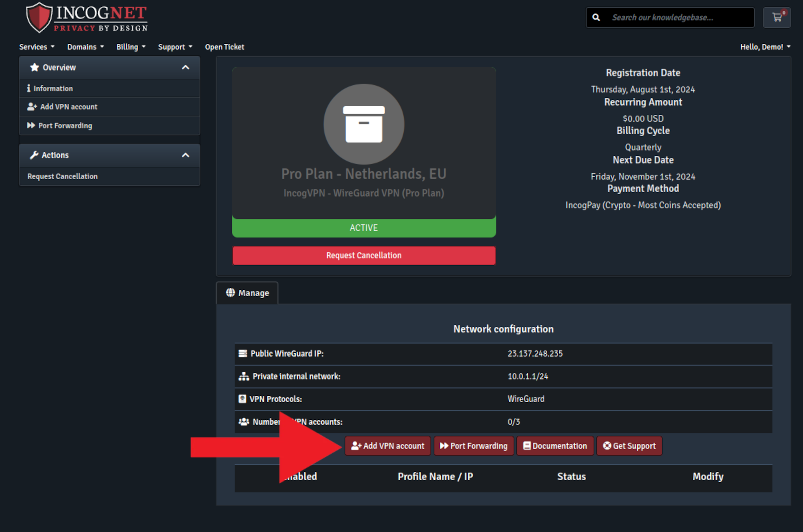
Screenshot showing "Add VPN Account" button.
-
-
Configure Your VPN Account: On the VPN account creation page, you'll need to fill out a few fields:
-
Username: This is primarily a label for your reference. Consider using names like "homelab" for a homelab server profile or "mobile" for a mobile device profile. Note that the username and password set here aren’t necessary for connecting to WireGuard, but will be used for future IKEv2 support.
-
Internal IP Address: Choose an IP within an internal subnet (e.g., 10.0.x.x/24). Devices connected to the same subnet can communicate with each other. For example, if you assign 10.0.1.2 to a Raspberry Pi running a webserver, your mobile device, when connected to IncogVPN at the same location, can access it remotely using that IP.
After completing the fields, click "Add VPN Account."
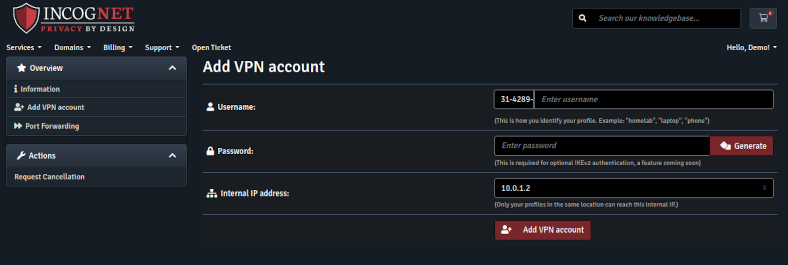
Screenshot showing VPN account creation fields. -
-
Manage and Connect to Your VPN Account: After creating your account, you'll return to the main plan details view, where your new VPN account will be listed. It will initially display as "Currently Offline." Let’s connect it.
-
Click "Manage Account" to proceed.
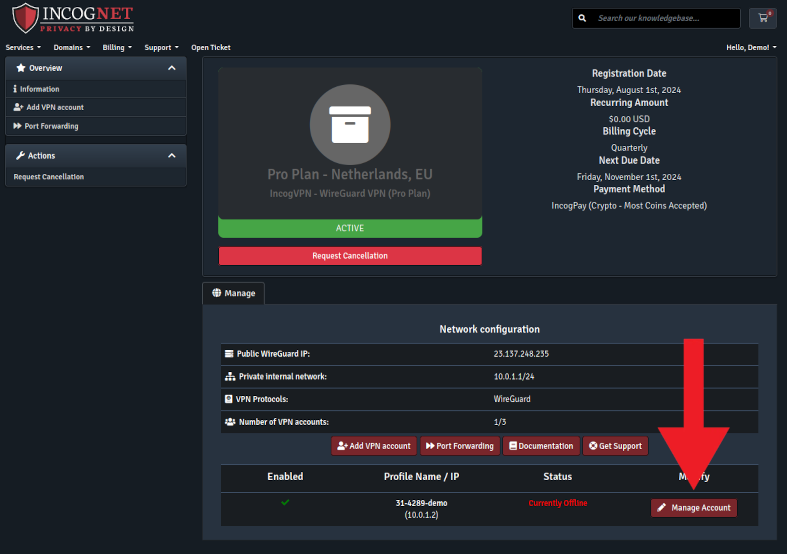
Screenshot showing account management options.
-
-
Connecting to IncogVPN: On the account management page, you have several options:
- Raw Config File: This can be copied and pasted into a terminal for configuring WireGuard on a remote server.
- Download Config File: The file is generated as
wg0.confby default, but you might want to rename it (e.g., "netherlands.conf") for easier identification. - QR Code: Ideal for quick setup on mobile devices—simply scan the code with the official WireGuard app.
You can find installation instructions and packages for various platforms including Windows, macOS, Linux distributions, and more. WireGuard apps for iOS and Android are also available. For easy setup, use the official app to scan the QR code, which will automatically import the configuration file. We recommend labeling it for easy identification.
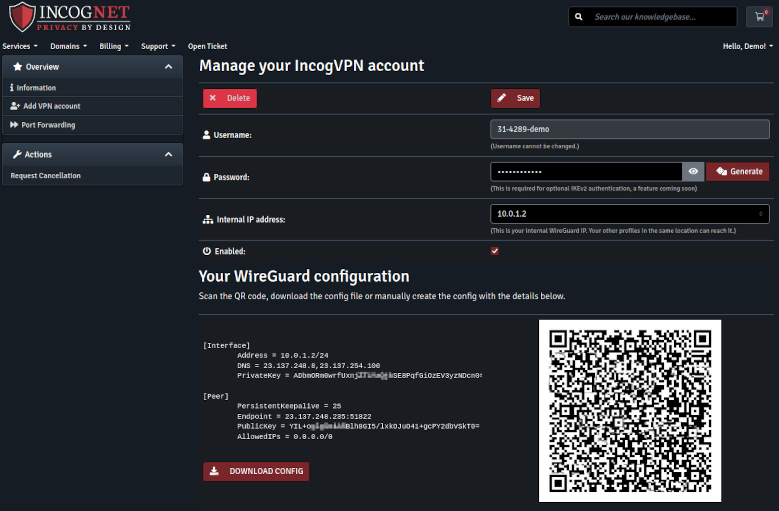
Screenshot showing connection options. -
Verify Connection: Once connected, return to the main plan view to confirm that the VPN is now online. You can also reveal the endpoint IP and port if needed. To create additional accounts, simply repeat the steps above.
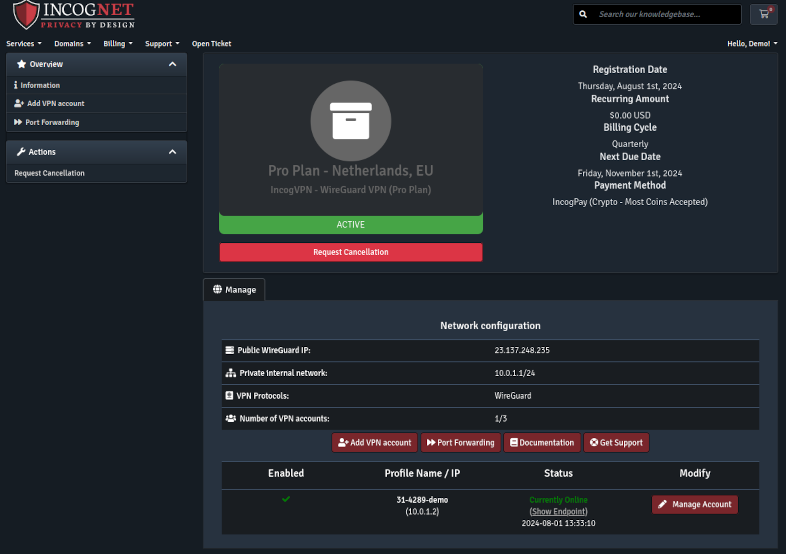
Screenshot showing VPN online status. -
Further Resources: More detailed guides on connecting, using advanced features like Port Forwarding, and more will be available soon. Stay tuned for updates!
